Description
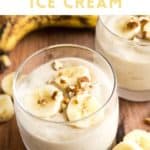
The creamiest homemade banana ice cream that feels just like the perfect soft serve. Just 2 ingredients required, no ice cream maker required, no-churn, made in just 5 minutes, and super healthy with zero added sugar. The perfect dessert for your sweet tooth on a hot summer day .Naturally gluten-free, dairy-free and vegan.
Ingredients
For the Banana Ice Cream:
- 4 cups sliced ripe bananas (roughly 3 large bananas or 4 medium bananas), and frozen for at least 4 hours or overnight.
- 1 tablespoon vanilla extract
For Toppings:
- 1/4 cup sliced bananas, for topping (optional)
- 1/4 cup chopped walnuts, for topping (optional)
Instructions
- Slice and Freeze Bananas: Peel the bananas, cut them into thin, even slices, and then freeze in a freezer-safe container for at least 4 hours.
- Combine and Blend: Combine 2 cups of the frozen banana slices and all the vanilla extract in the bowl of your electric blender or food processor and blend for a minute until you get a thick, creamy homogeneous mixture (you may need to use a spoon to accommodate the bananas as necessary). Add in the remaining frozen bananas and blend some more until all the bananas have been processed.
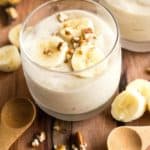
- Garnish and Serve: Serve immediately topped with sliced fresh bananas and a sprinkle of walnuts.
Notes
Bananas: It’s best to use ripe, spotty bananas for freezing because these are naturally sweet and have more sugars in them compared to unripe bananas. Technically, you’ll need sliced and frozen bananas (freeze for at least 4 hours), so I recommend freezing the sliced bananas ahead of time so you can enjoy this ice cream whenever the craving hits. Since we are not using any additional sugars or sweeteners in the recipe, the riper your bananas, the naturally sweeter the ice cream will be.
Vanilla Extract: I like adding a bit of vanilla extract for extra flavor, but if you’d rather not, feel free to leave it out.
Optional Toppings: I’ve sprinkled the homemade banana ice cream with crunchy chopped walnuts for a contrast in texture, as well as sliced bananas. However, feel free to swap out the walnuts for other nuts such as almonds, pistachios, cashews or even chocolate chips if you prefer.
Best eaten immediately: We’ve tried eating the banana ice cream immediately straight after blending it, and also tried freezing it and then eating after defrosting. In our opinion this ice cream tastes best eaten immediately, but freezing and defrosting is a close second too!
Blender/Food Processor: You can use either a high-speed blender or a food processor, both will work fine. I used a blender and it works perfectly. Just bear in mind that since blenders tend to be smaller in capacity than food processors, you may need to add smaller portions of bananas at a time and use a spoon to accommodate the bananas as necessary.
Freezing: If not eating immediately, transfer the banana ice cream to a loaf pan, cover with plastic wrap, and freeze. To eat, thaw for 15 minutes before scooping and serving.
Adapted from: Minimalist Baker
- Prep Time: 5 mins
- Category: Desserts
- Method: Blender