Learn how to make easy gluten-free hummus for a fraction of the cost of buying it, and the secret trick to making this hummus recipe extra creamy and light. Eat it with crunchy tortilla chips, gluten-free crackers, or our super popular gluten-free naan bread. Dairy-free and vegan too.
")
Want to save this recipe?
Enter your email & I’ll send it to your inbox. Plus, get great new recipes from me every week!
Jump to:
- What is Hummus?
- Making Homemade Hummus is Easier than You’d Think
- Why This Recipe Works:
- Ingredients You’ll Need:
- Ingredient Notes/Substitutions:
- Which to Use: Dried or Canned chickpeas?
- The Trick to Creamy Hummus: Peel the Chickpeas!
- How to Make Hummus (Step by Step):
- Dish by Dish Tips/Tricks:
- Recipe FAQs:
- If you enjoyed this hummus recipe, you’ll also love these other appetizers:
- Gluten-Free Appetizers You’ll Love:
- Creamy Gluten-Free Hummus Recipe (Dairy-Free, Vegan)
What is Hummus?
Basically, hummus is a savory Middle Eastern and Mediterranean dip that is typically made with mashed chickpeas (also known as garbanzo beans), lemon juice, tahini (sesame paste), fresh garlic and salt.
Hummus is usually eaten with some sort of flatbread, usually pita bread. However, since Juan and I always seem to have a bag of corn tortilla chips lying around, we tend to accompany the hummus with tortilla chips (we like the contrast between the crunchiness of the tortilla chips and creaminess of the hummus).
")
Making Homemade Hummus is Easier than You’d Think
If you’ve never made your own homemade hummus before, today is the day to try it, seriously. It’s become a favorite healthy dip at home.
I’ve made hummus before, but it was only when Juan came home with some store-bought hummus a month ago, when I really decided that I wanted to make it again.
Get delicious GLUTEN-FREE recipes each week!
The hummus he’d bought from a Middle Eastern restaurant was super creamy, light and airy. And I was set on replicating that. Especially since the hummus you buy at grocery stores tend to be quite expensive, and I mean, chickpeas aren’t expensive at all!
")
Why This Recipe Works:
- Simple Ingredients: The main ingredients required to make your own homemade hummus are easily accessible at the grocery store, and you might already have most of them at home!
- Easy to Make: This healthy hummus recipe is easy to make and while peeling the chickpeas may take a little more time and effort, it’s totally worth it.
- Creamy and Airy: This delicious hummus has the most amazingly smooth and creamy texture, and once you learn the trick to create it, you won’t go back to buying store-bought anymore!
- Totally Gluten-Free, Dairy-Free and Vegan: The best part is that this creamy hummus recipe is naturally 100% gluten-free, dairy-free and vegan, which means that even those with Celiac disease, or gluten and lactose intolerances, or those simply on a vegan or gluten-free diet can still enjoy it without worries!
Ingredients You’ll Need:
Here’s a visual overview of the ingredients required for making this creamy gluten-free hummus recipe.
(For exact measurements and quantities, please scroll down to the recipe card at the bottom of this post.)
")
Ingredient Notes/Substitutions:
- Chickpeas: You can either use dried or canned chickpeas. If you are using dried chickpeas, soak 1 cup of dry chickpeas in water overnight, and then drain the chickpeas the next day. Transfer soaked chickpeas to a pot, cover with water, and bring to a boil and then simmer for 1 to 1 1/2 hours until chickpeas are cooked. If you are using canned chickpeas, drain the chickpeas and then add them to a pot a cover with water, bring to a boil and simmer for 20 minutes to soften them a little.
- Garlic: The addition of fresh garlic creates extra flavor in the hummus and is an essential ingredient. However, if you prefer a less strong taste, feel free to reduce the number of garlic cloves used, or if you don’t enjoy the taste of garlic at all, leave it out completely.
- Chilled Ice Water: Make sure you use chilled water as it will create a creamy, light and fluffy texture for the hummus that will change the way you make it from now on.
- Tahini Paste: Tahini paste (a paste made from ground sesame seeds) is what is traditionally used in hummus, but if you don’t have this sesame seed paste on hand, you can also make the hummus without tahini (it just won’t be authentic). In this case, you can swap out the tahini with equal amounts of unsweetened cashew butter or almond butter, but beware that the taste will be slightly different from traditional hummus.
- Lemon Juice: The acidity of the lemon juice adds a pop of freshness to this creamy hummus recipe. For the best taste, I recommend using fresh lemon juice as opposed to bottled lemon juice.
- Olive Oil: I like using extra virgin olive oil because it has a stronger flavor that adds more depth to the hummus. Alternatively, you may also use avocado oil if you prefer.
- Ground Paprika and Chopped Parsley: I like garnishing the hummus with ground paprika and fresh chopped parsley for a nice pop of color and flavor.
Which to Use: Dried or Canned chickpeas?
Whether you use dried chickpeas or a can of chickpeas to make your homemade hummus is really a matter of preference, how much time you have, and whether you prefer to save a bit more money or save a bit more time.
- Dried Chickpeas: Since they can usually be bought in bulk at the supermarket or grocery store, and dried chickpeas are usually much cheaper. However, they do require an overnight soak and then cooking for at least 1 to 1 1/2 hours until they are softened slightly.
- Canned Chickpeas: On the other hand, canned chickpeas tend to be a little more expensive, with the advantage being that they are already pre-cooked and only require 20 minutes of stovetop simmer time. Even though canned chickpeas are technically pre-cooked, I would still recommend that you simmer them in hot water before making the hummus to get them to soften even further.
The Trick to Creamy Hummus: Peel the Chickpeas!
I’d say that this is probably the most important step to making deliciously creamy and silky smooth hummus.
While it may take up a bit more time to peel the chickpeas before processing, as opposed to processing the cooked chickpeas straightaway, the benefits totally outweigh the effort.
Peeling the cooked chickpeas one by one can be tedious work, so here’s how to make it a little easier. Cover the cooked chickpeas in hot water and add 1 1/2 teaspoons of baking soda. Let them soak for a few minutes and then you’ll see that the skins come off much easier!
How to Make Hummus (Step by Step):
1. Soak and Rinse Chickpeas:
Cover the cooked chickpeas (see notes on how to cook the chickpeas) with hot water and add 1 1/2 teaspoons of baking soda and let the chickpeas soak for a couple of minutes.
")
2. Peel the Chickpeas
Once they are done soaking, drain and rinse the chickpeas under cold water and rub the chickpeas between the palms of your hands to get the skins off, and remove the skins from the chickpeas.
")
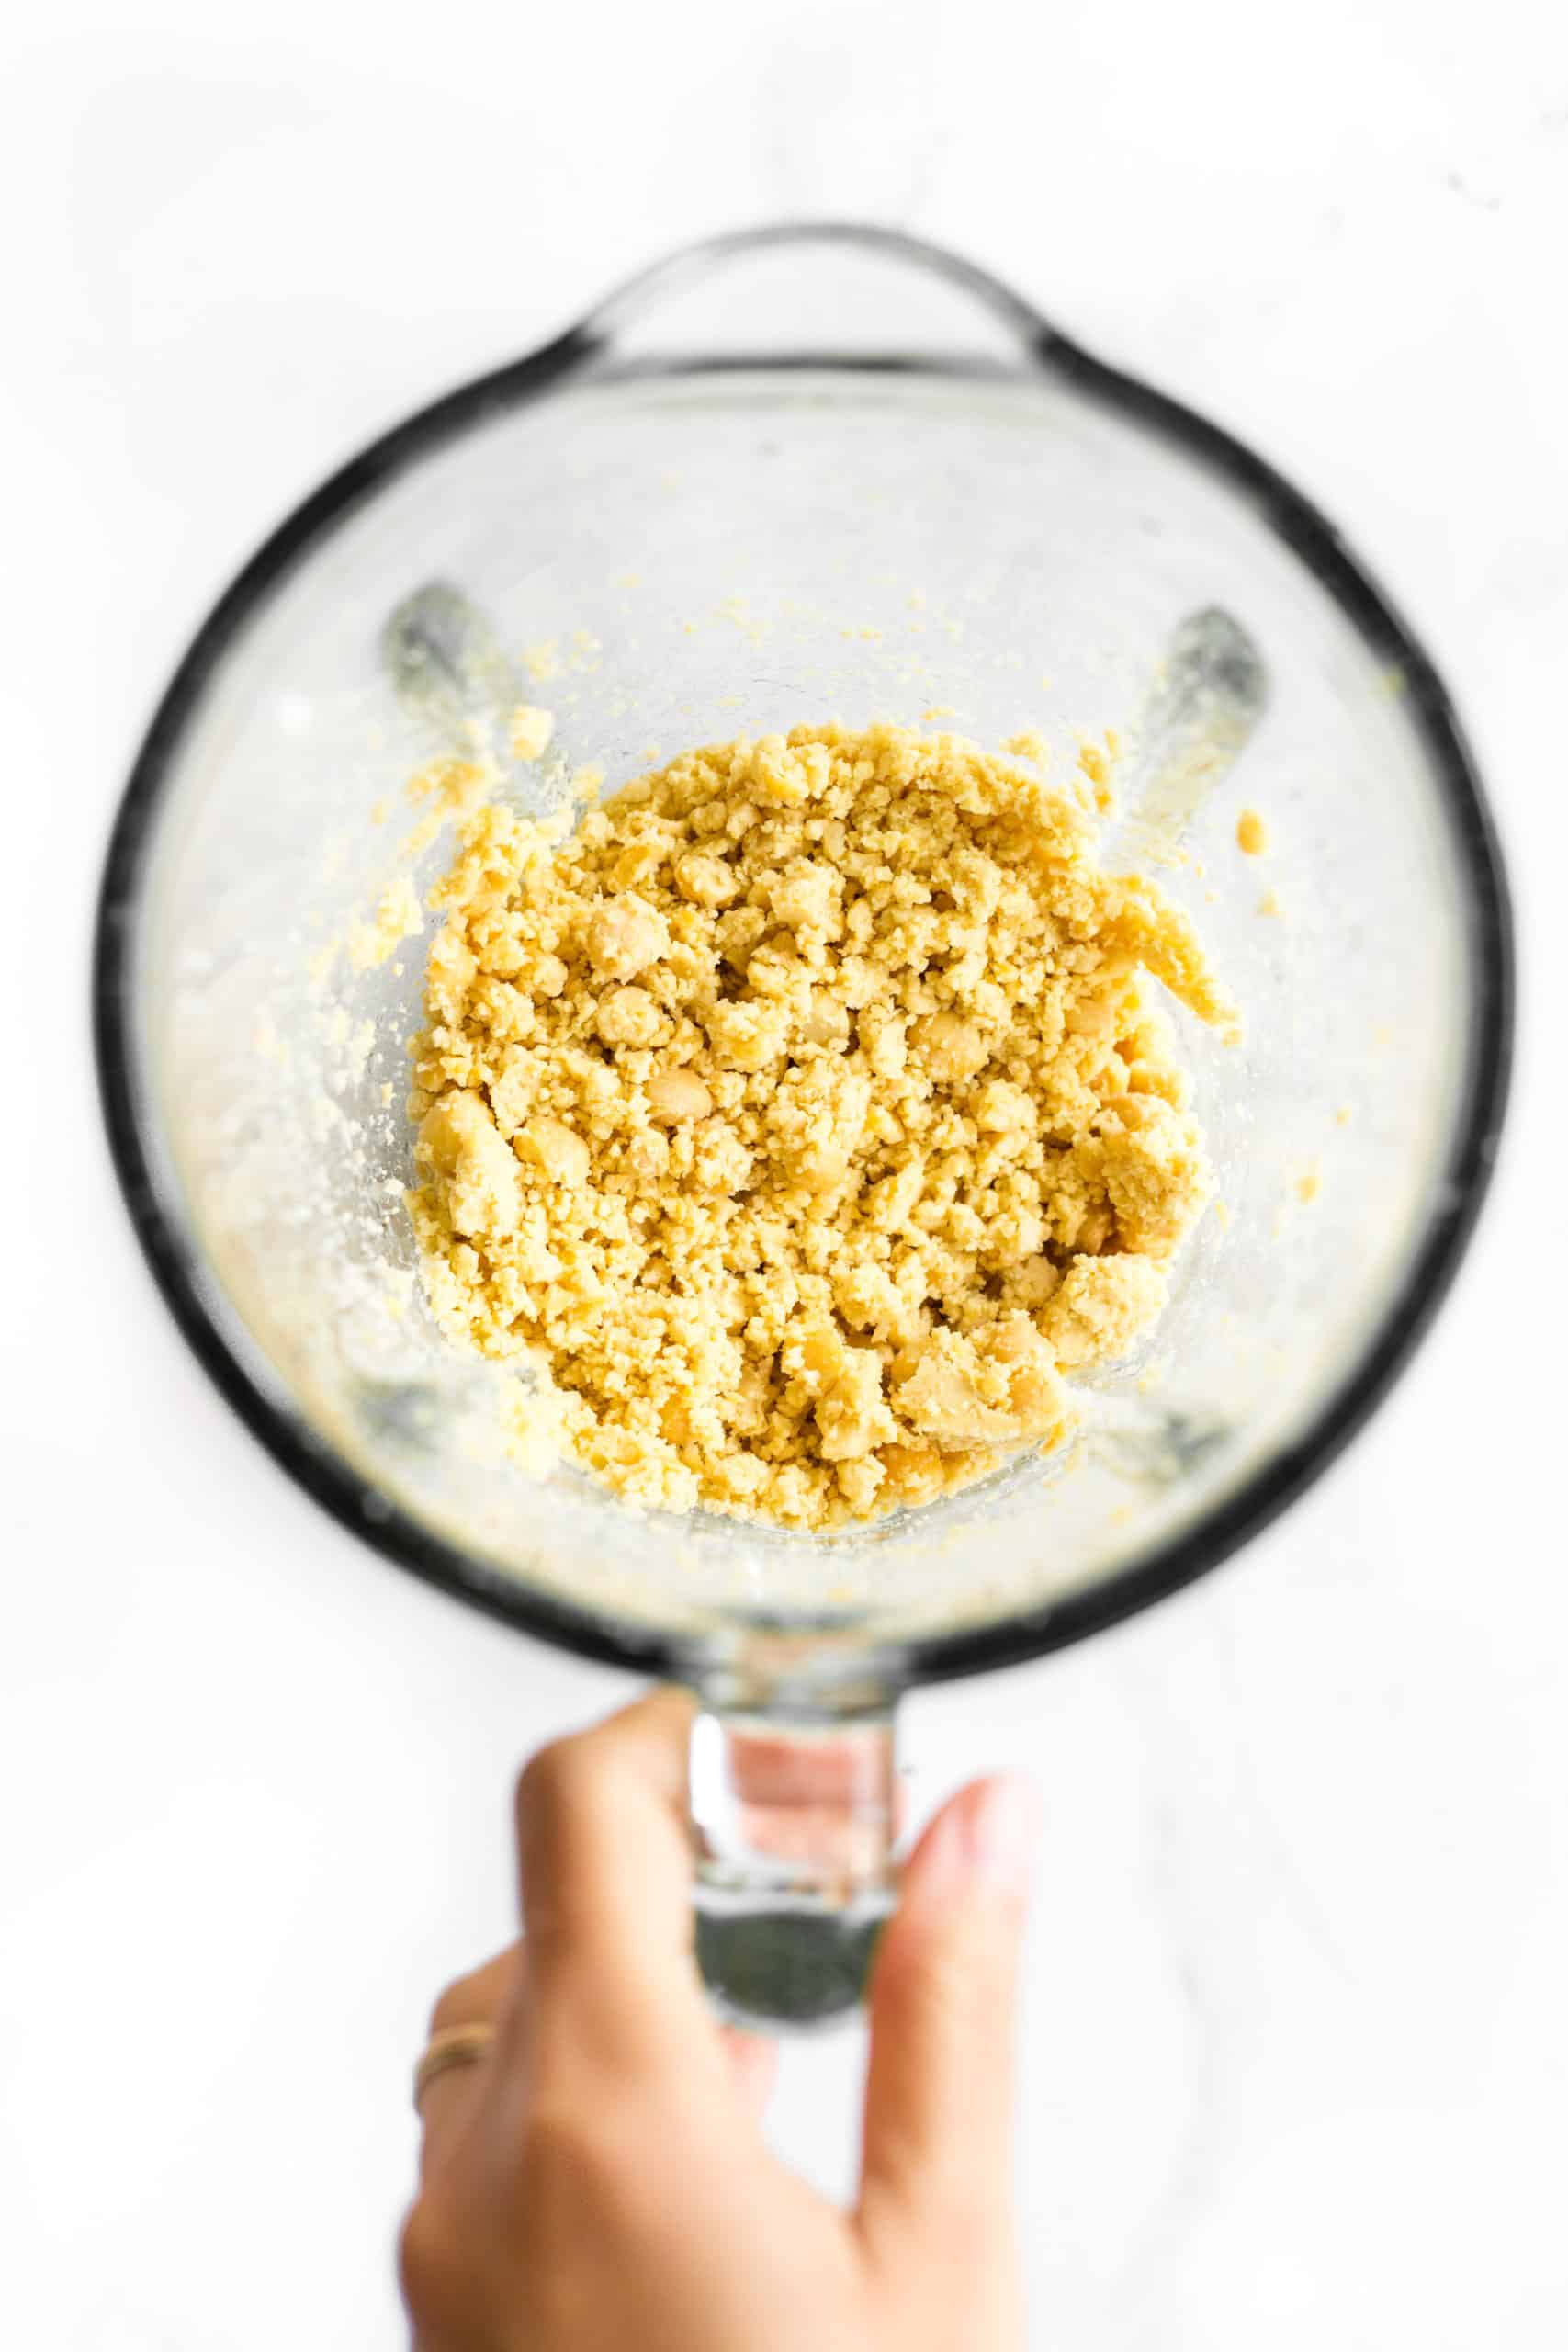
3. Blend Chickpeas, Garlic and Salt
Once you’ve got the chickpeas peeled, the bulk of the work for the homemade hummus is practically done. Now all you need to do is process the ingredients together.
")
Add the peeled chickpeas, minced garlic, and salt in your high-speed blender or food processor, and process until you get a sand-like texture, scraping down the sides as you need.
(Tip: Note that if you’re using a high speed blender like I did, you may need to process the chickpeas in 2 or 3 batches (depending on the size of your blender), scraping down the sides as needed.)
4. Add Tahini, Water, Lemon Juice and Oil
As the blender is running, add the tahini paste, chilled water, fresh lemon juice, and olive oil as the motor is running, and process for a few minutes until you get a smooth, creamy mixture.
Tip: #1: It’s very important to add the liquids with the motor running as this helps to incorporate more air into the hummus and makes it lighter and airier.
Tip #2: If the hummus is too thick for your liking, you can add a extra tablespoon of water at a time until you get your desired texture.
")
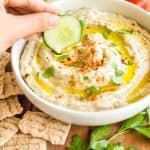
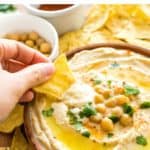
5. Garnish and Serve
Garnish this creamy hummus with a generous drizzle of olive oil, a sprinkle of ground paprika, whole chickpeas, and a handful of fresh chopped parsley. Accompany with tortilla chips, our favorite gluten-free naan bread, gluten-free crackers or gluten-free breadsticks.

Dish by Dish Tips/Tricks:
- Make Sure to Peel the Chickpeas: Try to remove the skins from chickpeas as much as possible. Even though it will take extra effort and time, trust me, this really is THE trick to creamier hummus.
- Extra Spices to Add: If you really like an explosion of taste, feel free to add extra spices such as ground cumin or even onion powder.
- Garnish for Contrast and Color: I highly recommend adding a drizzle of olive oil for some shine, a sprinkle of paprika and fresh chopped parsley for vibrance and contrast, and a few whole chickpeas for the final touch.
- Serving Suggestions: Traditionally hummus is usually served with some sort of flatbread such as pita bread. In our house, however, we eat 100% gluten-free and usually always have a bag of corn tortilla chips around, so we typically accompany the hummus with tortilla chips or our favorite easy gluten-free naan bread. You can also serve it with these crunchy gluten-free crackers or gluten-free breadsticks. Either way, this tastes amazing. What are you waiting for? Dig right on in!
Recipe FAQs:
As I mentioned above, authentic hummus is traditionally made with tahini (ground hulled sesame paste), which gives traditional hummus a “nutty” taste. However, you may not always have tahini at home, or you may not want to spend on tahini which can be quite expensive. In that case that you choose to make tahini-free hummus, you can swap out the tahini for equal amounts of almond butter or cashew butter. I personally prefer cashew butter because cashew butter is similiar in color to tahini and will not alter the color of hummus, whereas almond butter may make the hummus slightly darker in color.
To store, place the gluten-free hummus in an airtight container and store in the refrigerator for up to 3 days.
Yes, you can freeze it. Place the hummus in a freezer-safe container or ziplock bag and freeze for up to 3 months. Let hummus thaw overnight in the refrigerator before serving.
")
If you enjoyed this hummus recipe, you’ll also love these other appetizers:
- Crispy Air Fryer Chickpeas (Gluten-Free, Vegan)
- Chickpea Flatbread (Gluten-Free, Vegan)
- Pico de Gallo (Salsa Fresca)
- Gluten-Free Polenta Bruschetta
- Mini Caprese Eggplant Pizzas
- Grilled Eggplant Sesame Dip (Baba Ganoush)
Gluten-Free Appetizers You’ll Love:

P.S. If you try this recipe, I’d love for you to leave a star rating below, and/or a review in the comment section further down the page. I always appreciate your feedback. Be sure to check out my entire Recipe Index for all the recipes on the blog. You can also follow me on Pinterest, Facebook or Instagram! Sign up for my Email List to get fresh recipes in your inbox each week!
Print
Creamy Gluten-Free Hummus Recipe (Dairy-Free, Vegan)
- Total Time: 20 minutes
- Yield: 4 servings 1x
- Diet: Vegan
Description
Learn how to make easy gluten-free hummus for a fraction of the cost of buying it, and the secret trick to making this hummus recipe extra creamy and light. Eat it with crunchy tortilla chips, gluten-free crackers, or our super popular gluten-free naan bread. Dairy-free and vegan too.
Ingredients
- 3 cups cooked chickpeas, (see notes below for how to prepare the chickpeas)
- 3 garlic cloves, minced
- 3/4 teaspoon salt
- 1/4 cup chilled ice water, plus more as needed
- 1/3 cup tahini paste
- 1/4 cup fresh lemon juice
- 2 tablespoons extra virgin olive oil, plus more for drizzling
- Ground paprika, for garnish
- Fresh chopped parsley, for garnish
Instructions
- Soak and Rinse Chickpeas: Cover the cooked chickpeas with hot water and add 1 1/2 teaspoons of baking soda and let the chickpeas soak for a couple of minutes.
- Peel the Chickpeas: Once they are done soaking, drain and rinse the chickpeas under cold water and rub the chickpeas between the palms of your hands to get the skins off, and remove the skins from the chickpeas.
- Blend Chickpeas, Garlic and Salt: Add the peeled chickpeas, minced garlic, and salt in your high-speed blender or food processor, and process until you get a sand-like texture, scraping down the sides as you need. If you use a blender like I did, you may need to process half of chickpeas first and then add the rest a bit of the time.
- Add Tahini, Water, Lemon Juice and Olive Oil: As the blender is running, add the tahini paste, chilled water, fresh lemon juice, and olive oil. (It’s important that you add the liquids as the motor is running so more air is incorporated into the hummus and this creates a lighter, airier texture). If the mixture is still too thick for your liking, add in a little bit more of chilled water at a time until you get a smooth, creamy texture.
- Garnish and Serve: Serve this creamy hummus with a generous drizzle of olive oil, a sprinkle of ground paprika, whole chickpeas, and a handful of fresh chopped parsley. Accompany with tortilla chips or our favorite gluten-free naan bread.
Notes
Chickpeas: If you use dried chickpeas, soak 1 cup of dried chickpeas in water overnight, and then drain the chickpeas the next day. Transfer soaked chickpeas to a pot, cover with water, and bring to a boil and then simmer for 1 to 1 1/2 hours until chickpeas are cooked. If you are using canned chickpeas, drain the chickpeas and then add them to a pot a cover with water, bring to a boil and simmer for 20 minutes to soften them a little.
Garlic: The addition of fresh garlic creates extra flavor in the hummus and is an essential ingredient. However, if you prefer a less strong taste, feel free to reduce the number of garlic cloves used, or if you don’t enjoy the taste of garlic at all, leave it out completely.
Chilled Ice Water: Make sure you use chilled water as it will create a creamy, light and fluffy texture for the hummus that will change the way you make it from now on.
Tahini Paste: Tahini paste is what is traditionally used in hummus, but if you don’t have it on hand, you can also make the hummus without tahini (it just won’t be authentic). In this case, you can swap out the tahini with equal amounts of cashew butter or almond butter, but beware that the taste will be slightly different from traditional hummus.
Lemon Juice: The acidity of the lemon juice adds a pop of freshness to the hummus. For the best taste, I recommend using fresh lemon juice as opposed to bottled lemon juice.
Olive Oil: I like using extra virgin olive oil because it has a stronger flavor that adds more depth to the hummus. Alternatively, you may also use avocado oil if you prefer.
Ground Paprika and Chopped Parsley: I like garnishing the hummus with ground paprika and fresh chopped parsley for a nice pop of color and flavor.
Make Sure to Peel the Chickpeas: Try to remove the skins from chickpeas as much as possible. Even though it will take extra effort and time, trust me, this really is THE trick to creamier hummus.
To Serve: Traditionally hummus is usually served with some sort of flatbread such as pita bread. In our house, however, we eat 100% gluten-free and usually always have a bag of corn tortilla chips around, so we typically accompany the hummus with tortilla chips. You can also eat it with our popular recipe for easy gluten-free naan bread.
Adapted from: The Mediterranean Dish
This recipe was originally published in June 2020, but has since been republished to include clearer instructions and text, as well as ingredient notes and substitutions.
- Prep Time: 20 mins
- Category: Appetizers
- Method: Blender
- Cuisine: Middle Eastern


Hello Felicia,
Thanks for the wonderful tip of easily removing the skin of the chick peas by soaking in baking soda.
Such tip in your blog post is always very helpful to people who are working on the ingredients within the recipe for the first time.
Bless your heart, darling!
Mum
Hi mummy, glad you found the tip useful 🙂 It definitely takes more time, but it’s worth the effort!
Hello Flea! Paul once shared that chickpeas are a superfood and an excellent source of protein. Thanks for sharing this recipe!
Hi babe!! Wow, I didn’t know that chickpeas are a superfood! Thanks for the tip. Ok that gives me more reasons to eat more hummus LOL. Enjoy your weekend and send my love to Paul and your mum! xxx, flea
Hi Felicia,
If I make a batch of hummus in advance to be enjoyed at a later time, how long can I keep it in the fridge and still good for serving?
Thanks again for sharing the versatility of the different ingredients for variety.
Sending you love, joy and blessings,
Mum
Hi mummy! I believe you can keep it in an airtight container for up to 3 days in the fridge 🙂 If you make it let me know!! Hope you like it!
homemade hummus is the best!
agreed!!
Hi, I just wanted to say I love your blog, because you have so many different recipes here, and I am always looking for new recipes to try. I always read Good House.keeping magazine because they usually have great recipes in them. I am nominating you for the inspiring blog award.
http://blogdeliciously.wordpress.com/2012/11/27/inspiring-blogger-award-2/comment-page-1/#comment-87
I absolutely LOVE hummus and its versatility!! Have you tried roasted red pepper hummus? that’s really good too!!
Hi Min!
thanks for dropping by and commenting! Nope.. actually I’ve never even heard of roasted red pepper hummus! do u happen to know a good and easy recipe for that?
🙂 great suggestion by the way! thanks!!
felicia
I really like this recipe!!
http://ohsheglows.com/2011/09/09/ultra-creamy-red-pepper-hummus-how-to-roast-peppers/
Hope you check it out! Have you visited Angela’s site before? Her recipes are delicious and her photos…oh man…remarkable!
Will definitely check out Angela’s site!! thanks for the recommendation!! enjoy ur day!