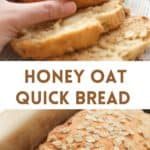
Easy Honey Oat Bread (Gluten-Free, Dairy-Free Option)
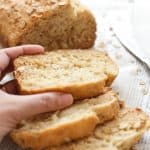
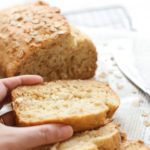
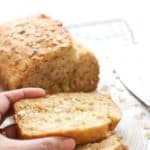
An easy and moist honey oat bread studded with oats and sweetened with honey. No yeast required for this recipe, and you’ll get tender, fluffy bread every single time. Bake a loaf from scratch in under an hour! Delicious on its own or toasted with jam, it’s perfect for breakfast, tea or an anytime snack! Gluten-free with a dairy-free option.
")
Want to save this recipe?
Enter your email & I’ll send it to your inbox. Plus, get great new recipes from me every week!
Note: This recipe was originally published in July 2018, and has constantly been THE MOST POPULAR recipe on Dish by Dish. So I’ve updated the post with clearer instructions, notes on ingredient substitutions, better process shots, as well as included a dairy-free option. I hope you continue to enjoy it as much as we do!
Jump to:
- My Love For Homemade Bread
- The Easiest Gluten-Free Quick Bread You’ll Make
- Amazing Gluten-Free 1:1 Flour
- Why This Recipe Works:
- Ingredients You’ll Need:
- Ingredient Notes/Substitutes:
- How to Make Honey Oat Bread (Step by Step):
- Dish by Dish Tips & Tricks:
- Recipe FAQs:
- Other Oat Recipes to Enjoy:
- Delicious Gluten-Free Bread Recipes You’ll Love:
- Honey Oat Bread (Gluten-Free, Dairy-Free Option)
My Love For Homemade Bread
I love baking bread, and in the past year, I’ve been baking a whole lot of bread.
Some of our favorite homemade bread recipes include this perfectly soft fluffy gluten-free bread, this hugely popular buckwheat bread, this tender millet bread, this fluffy potato bread, these soft gluten-free dinner rolls, and this gorgeous rosemary focaccia bread.
Nothing beats pulling out a loaf of fresh bread from the oven, and I honestly don’t think I could possibly get bored of making and developing gluten-free bread recipes.
The Easiest Gluten-Free Quick Bread You’ll Make
However, most bread recipes require yeast, and naturally, require rising time.
If you’re in a rush, or simply don’t feel like waiting for bread dough to rise, or are allergic to baker’s yeast, then I know today’s recipe for this easy honey oat bread is your answer.
Since this is a quick bread, no yeast is required, and hence no rising time needed either.
Naturally sweetened with honey for just a hint of sweetness (no other sweeteners included), and studded with gluten-free rolled oats, this easy honey oat bread comes together in less than an hour from start to finish! How’s that for amazing?
If this is your first time making your own bread, you’re definitely in for a treat!
")
Amazing Gluten-Free 1:1 Flour
When I was still living in New York in 2018, my friend Marina from photography class told me about Cup4Cup, a brand of gluten-free flour that you can use to substitute normal wheat flour literally cup for cup.
Her son is celiac, just like Juan, so when she swore by this brand of flour, and told me I could use it with literally any normal recipe, I was curious, so I bought a bag of the Cup4Cup multipurpose gluten-free flour to try out, and the first recipe I made with it was this gluten-free oat bread (which I’ve barely adapted from Celebrating Sweets) .
")
Why This Recipe Works:
- Simple Ingredients: All you need to make this delicious gluten-free oat bread recipe are easily accessible ingredients that you can get at your grocery store (nothing fancy required!).
- No Yeast or Rising Time: This honey oat quick bread uses baking powder as a leavening agent, so there’s no yeast or rising time needed. Which means less prep time and you can enjoy a loaf sooner. Also, if you’re allergic to baker’s yeast, this no-yeast quick bread recipe is perfect for you!
- Easy To Make: Simply mix the wet ingredients and the dry ingredients together to form the bread dough, then transfer it to the loaf pan and bake this gluten-free oat bread until ready! How much easier can baking homemade bread get?
- Totally Gluten-Free (with Dairy-Free Option): Unlike other oat bread recipes that use whole wheat flour, this recipe uses a gluten-free flour blend, which makes this bread recipe 100% gluten-free (and can be easily made dairy-free too). This means that even those who have Celiac disease or have gluten or lactose intolerances, can still enjoy this bread without worries!
Ingredients You’ll Need:
Here’s a visual overview of the ingredients required for this honey oat bread recipe.
(For exact measurements, please scroll down to the printable recipe card at the bottom of this post.)
")
Ingredient Notes/Substitutes:
- Gluten-Free Flour: I use and recommend Cup4Cup Gluten-Free 1:1 multipurpose flour in this recipe (but it does contain milk, so for a dairy-free option, make sure to use a dairy-free gluten-free measure for measure flour). For best results, make sure to use a gluten-free flour blend that is made with light flours/starches (such as rice flour, corn starch, potato starch or tapioca starch) to ensure a lighter and fluffier texture. I do NOT recommend using blends that include heavier flours (such as garbanzo bean flour) as this will result in a denser bread.
- Xanthan Gum: Xanthan gum is the substitute for gluten in gluten-free flours, and helps the ingredients to bind better together. If your gluten-free flour blend does not already include it, make sure to add it in.
- Baking Powder: Since this is a yeast-free bread, and baking powder is the only leavening agent to help the batter rise, it’s pertinent to add it in. If you have Celiac disease or are gluten-intolerant, make sure you use certified gluten-free baking powder.
- Yogurt: I used regular Greek yogurt in this recipe, but you can also make this honey oat bread dairy-free by using dairy-free Greek yogurt.
- Egg: The egg acts as a binder for the ingredients and gives the batter lift. However, if you are allergic to eggs or simply want to keep this recipe egg-free, you can use an egg-replacer or aquafaba instead.
- Coconut Oil: I prefer using refined coconut oil for my baking because it has a neutral taste (as opposed to extra virgin coconut oil which as a more pronounced flavor and smell). Alternatively, if you are not lactose-intolerant, feel free to use melted butter instead.
- Honey: I used honey as a natural sweetener for the bread, but you can also use agave nectar or maple syrup if you prefer.
- Rolled Oats: If you are allergic to gluten, make sure you buy gluten-free rolled oats (this is because oats are often processed in the same facilities as wheat and there may be cross-contamination).
- Almond Milk: I used my 5-minute homemade almond milk here, but you can also use other unsweetened non-dairy milk (such as cashew milk, rice milk or oat milk). Alternatively, if you are not lactose-intolerant, go ahead and use regular milk if you prefer.
How to Make Honey Oat Bread (Step by Step):
1. Preheat and Line
Preheat oven to 375 deg. Fahrenheit and grease a 9×5-inch loaf pan and line with parchment paper. Adjust oven rack to the middle position.
2. Whisk Dry Ingredients
In a large mixing bowl, sift the all-purpose flour, baking powder, and salt together in a large bowl, and whisk well until combined.
")
3. Mix Wet Ingredients and Oats
In a medium bowl, beat the egg, yogurt, melted coconut oil, 1/4 cup honey, and 1 cup oats together until well blended. Now stir in the milk and mix until combined.
")
4. Combine Wet and Dry Ingredients to Form Dough
Slowly add the wet oat mixture into the bowl with the flour mixture, stirring with a wooden spoon until just incorporated.
You will get a thick oat bread dough that looks more like cake batter – see the photo below (do not over-mix as bread may become too tough).
")
5. Transfer to Pan and Top with Oats
Pour the batter-like dough into the prepared loaf pan, and sprinkle the top of the loaf with the remaining 2 tablespoons of quick oats.
")
6. Bake Until Golden Brown
Bake in the center rack of the oven until bread is deeply golden brown on top and a toothpick inserted in the middle comes out clean (approximately 30 to 45 minutes).
")
7. Let Cool Completely Before Brushing with Honey
Remove the gluten-free oat bread from the pan and place loaf on a cooling rack to cool completely at room temperature before brushing with the remaining honey, then slicing and serving.
")
Dish by Dish Tips & Tricks:
- Line loaf pan with parchment: I find that lining the loaf pan with parchment paper makes it way easier to lift up the loaf from the pan (and ensure that the bottom doesn’t stick). If you don’t have parchment paper on hand, just make sure you grease the pan well and sprinkle a little bit of flour on the bottom before transferring the batter to the pan.
- Use a Metal Loaf Pan: For best results, I recommend baking this honey oat bread in a metal loaf pan to ensure that it bakes evenly on the bottom as well as the sides.
- To Prevent Over-Browning: If you notice that the gluten-free oat bread is turning brown on the top but the middle is still not done, tent the loaf with aluminum foil for the last 10 minutes as the loaf continues baking.
Recipe FAQs:
To store, wrap cooled honey oat quick bread in plastic wrap or an airtight container and keep in the refrigerator for up to 5 days.
Yes you can! To freeze, wrap the cooled gluten-free oatmeal bread in plastic wrap and freeze for up to 3 months. Let frozen loaf thaw overnight in the refrigerator before slicing.
Oats are naturally gluten-free, however, they are often processed in the same facilities that process wheat or other grains that contain gluten. If you are Celiac or have gluten intolerances or allergies, make sure you use gluten-free rolled oats in this recipe. Do note that some Celiacs may experience similar reactions to oats as they do with gluten, so this would depend on your personal experience.
")
Other Oat Recipes to Enjoy:
- Easy Oatmeal Cookies (Gluten-Free, Dairy-Free)
- Oatmeal Walnut Cookies (Gluten-Free)
- Oat Waffles (Gluten-Free)
- Maple Peach Oatmeal (Gluten-Free)
Delicious Gluten-Free Bread Recipes You’ll Love:
- 10 Amazing Gluten-Free Bread Recipes to Make on Repeat
- Soft Fluffy Gluten-Free Bread (Dairy-Free)
- Rosemary Focaccia Bread (Gluten-Free, Vegan)
- Easy Gluten-Free Naan Bread (Dairy-Free)
- Gluten-Free Flaxseed Coconut Bread (Paleo, Dairy-Free)
- Honey Quinoa Bread (Gluten-Free, Dairy-Free)
- Easy Gluten-Free No-Knead Bread (Dairy-Free)
- Gluten-Free Carrot Cake Bread (Dairy-Free)
- The Best Gluten-Free Banana Bread (Dairy-Free)
- Gluten-Free Vegan Pumpkin Bread
- Grain-Free Rosemary Almond Bread
- Grain-Free Coconut Cashew Bread


P.S. If you try this recipe, I’d love for you to leave a star rating below, and/or a review in the comment section further down the page. I always appreciate your feedback. Be sure to check out my entire Recipe Index for all the recipes on the blog. You can also follow me on Pinterest, Facebook or Instagram! Sign up for my Email List to get fresh recipes in your inbox each week!
Honey Oat Bread (Gluten-Free, Dairy-Free Option)
- Total Time: 55 minutes
- Yield: 1 loaf 1x
- Diet: Gluten Free
Description
A super easy and moist honey oat bread studded with oats and sweetened with honey. No yeast required for this recipe, and you’ll get tender, fluffy bread every single time. Bake a loaf from scratch in under an hour! Delicious on its own or toasted with jam, it’s perfect for breakfast, tea or an anytime snack! Gluten-free with a dairy-free option.
Ingredients
- 2 1/3 cups gluten-free measure for measure flour
- 3/4 teaspoons xanthan gum (omit if your GF flour blend already includes it)
- 2 1/2 teaspoons baking powder
- 1 teaspoon salt
- 1 cup plain Greek yogurt (or dairy-free Greek yogurt for dairy-free option)
- 1 large egg
- 1/4 cup coconut oil, melted
- 1/4 cup + 1 tablespoon honey, separated
- 1 cup + 2 tablespoons old fashioned gluten-free rolled oats, separated
- 3/4 cup unsweetened almond milk
Instructions
- Preheat and Line: Preheat oven to 375 deg. Fahrenheit and grease a 9×5-inch loaf pan and line with parchment paper. Adjust oven rack to the middle position.
- Whisk Dry Ingredients: In a large mixing bowl, sift the all-purpose flour, baking powder, and salt together in a large bowl, and whisk well until combined.
- Mix Wet Ingredients and Oats: In a medium bowl, beat the egg, yogurt, melted coconut oil, 1/4 cup honey, and 1 cup oats together until well blended. Now stir in the milk and mix until combined.
- Combine to Form Dough: Slowly add the wet ingredients into the bowl with the dry ingredients, stirring with a wooden spoon until just incorporated (do not over-mix as bread may become too tough). The dough will resemble a thick and wet cake batter.
- Transfer to Pan and Top with Oats: Pour batter-like dough into the prepared loaf pan, and sprinkle the top with the remaining 2 tablespoons of oats.
- Bake Until Golden Brown: Bake in the center rack of the oven until bread is golden brown on top and a toothpick inserted in the middle comes out clean (approximately 30 to 45 minutes).
- Let Cool Completely Before Brushing with Honey: Remove bread from the pan and allow it to cool completely on a cooling rack before brushing with the remaining honey, then slicing and serving.
Notes
Gluten-Free Flour: I use and recommend Cup4Cup Gluten-Free 1:1 multipurpose flour in this recipe (but it does contain milk, so for a dairy-free option, make sure to use a dairy-free gluten-free measure for measure flour). For best results, make sure to use a gluten-free flour blend that is made with light flours/starches (such as rice flour, corn starch, potato starch or tapioca starch) to ensure a lighter and fluffier texture. I do NOT recommend using blends that include heavier flours (such as garbanzo bean flour) as this will result in a denser bread.
Xanthan Gum: Xanthan gum is the substitute for gluten in gluten-free flours, and helps the ingredients to bind better together. If your gluten-free flour blend does not already include it, make sure to add it in.
Baking Powder: Since this is a yeast-free bread, and baking powder is the only leavening agent to help the batter rise, it’s pertinent to add it in. If you have Celiac disease or are gluten-intolerant, make sure you use certified gluten-free baking powder.
Yogurt: I used regular Greek yogurt in this recipe, but you can also make this honey oat bread dairy-free by using dairy-free Greek yogurt.
Egg: The egg acts as a binder for the ingredients and gives the batter lift. However, if you are allergic to eggs or simply want to keep this recipe egg-free, you can use an egg-replacer or aquafaba instead.
Coconut Oil: I prefer using refined coconut oil for my baking because it has a neutral taste (as opposed to extra virgin coconut oil which as a more pronounced flavor and smell). Alternatively, if you are not lactose-intolerant, feel free to use melted butter instead.
Honey: I used honey as a natural sweetener for the bread, but you can also use agave nectar or maple syrup if you prefer.
Rolled Oats: If you are allergic to gluten, make sure you buy gluten-free rolled oats (sometimes oats are processed in the same facilities as wheat and there may be cross-contamination).
Almond Milk: I used my 5-minute homemade almond milk here, but you can also use other unsweetened non-dairy milk (such as cashew milk, rice milk or oat milk). Alternatively, if you are not lactose-intolerant, go ahead and use normal cow’s milk if you prefer.
Storing: To store, wrap cooled the honey oatmeal bread in plastic wrap and keep in the refrigerator for up to 5 days.
Freezing: To freeze, wrap the cooled loaf in various layers of plastic wrap and freeze for up to 3 months. Let frozen loaf thaw overnight in the refrigerator before slicing.
Barely adapted from: Celebrating Sweets
This recipe was originally published in July 2018, but has since been revised with clearer instructions, step-by-step process shots, and to include a dairy-free option.
- Prep Time: 10 mins
- Cook Time: 45 mins
- Category: Bread
- Method: Baking
- Cuisine: American
I tried this recipe and baked the loaf for close to an hour, but the loaf still came out dense and gummy. After the load had cooled, I put it back in the oven and covered it with foil and let it bake for another 20 minutes but that achieved no difference in the bread. I used Bob’s Red Mill 1 to 1 gluten free flour. It did not look like that good, fluffy texture that it has in the picture up above haha.
Hi Eden, in this recipe I recommend using Cup4Cup flour, which is what I used and works great.
What can I use, living in the uk, in place of measures for measure gluten free flour? We cannot buy that here.
Hi Jan, I think you should be able to find King Arthur Flour Measure for Measure gluten-free flour on online retailers in the UK.
The taste of this bread was very good, however my loaf turned out rather dense/gummy even though I cooked for longer. I used old fashioned rolled oats. I was thinking of trying again with quick oats to see if that makes a difference. Could you please tell me what type of oats you used in your recipe? Thanks!
Hi Kristine, I don’t think it’s an issue with the types of oats. I’m thinking it could be due to the type of gluten-free flour blend you used. I recommend the Cup4Cup flour blend in this recipe.