When I think back on those years during I scoffed at cooking, I wish I’d been able to peek into the future, and see that when I finally did venture into the kitchen, I’d be hooked for good.
It’s weird remembering how much I abhorred the kitchen and the chores of cooking – including grocery-shopping, menu-planning and finally ingredient-prepping and cooking. What I didn’t realize then, in those years that I felt cooking should be delegated to someone else whenever possible, is that knowing how to cook or create your own food makes you independent.
Want to save this recipe?
Enter your email & I'll send it to your inbox. Plus, get great new recipes from me every week!
The ability to cook, and take simple but fresh ingredients together to make a palatable, healthy dish is absolutely empowering.
No longer do you have to depend on take-out food, or on the domestic helper or someone else (even if it is someone you love) to put food on the table. You don’t have to order in Chinese food delivery if you have a craving for fried rice, which can be brought together easily with the right ingredients on hand. You don’t have to wait for your partner to be home in order to have dinner on the table. With simple recipes to guide you and general common sense, you can make dinner all by yourself.
Get delicious GLUTEN-FREE recipes each week!

But more importantly, knowing how to cook – and a desire to expand your repertoire of dishes – will expose you to a variety of ingredients and methods of preparing a meal or a snack that you might never have imagined to use before.
My favorite example is quinoa – it’s a grain-like seed that I wouldn’t have tried if not for the fact that the food blogs I read keep using it as part of their featured meals. If I’d shunned this strange ingredient for the safety of more familiar foods like rice, I would never have gotten the chance to enjoy this gluten-free ingredient and its beautiful, nutty flavor. Quinoa was probably the first “new” and unfamiliar ingredient that found its way into my pantry, and I’m so glad for that.
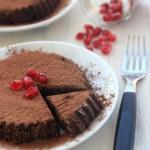
I wouldn’t have realized that it was possible to make a wild berry cheesecake without baking, either, if I was so afraid of trying out new methods and interesting recipes. I would have just stuck to the same old pound cake recipe and churned out pound cakes my whole life.

But I’ve realized that an open and curious mind very often leads to new experiences that can be wonderful.
Take the example of this wheat-free journey I’m taking (and hey! I’m proud to say that since the start of this year, I’ve pretty much stuck 90% to my wheat-free diet, which also makes me feel more energetic without food comas or random hunger urges!).
Naturally, when I search and seek out new recipes to test, I’m drawn to those who are off the beaten path.
Foods that use exotic ingredients (like dates and chia seeds), or require uncommon methods of preparation (such as no-bake, raw, steamed), tend to draw my attention. I usually take a while to digest the information or require a few weeks to eventually decide on trying the recipe, but while the recipe sits in my bookmark folder and waits for its turn, I finally psyche up enough courage and inspiration to do so.

When I first chanced upon a recipe for raw brownies months ago, I remembering crinkling my nose, wondering how a brownie could be raw.
I’d imagined raw eggs and cocoa powder in one large mess…Obviously, I should have figured out that a different method of preparation would usually involve ingredients different from which I am accustomed to, but that came later.
After a few months of seeing various versions of raw brownie recipes, I finally saw one that caught my eye. I think I was probably ready by then to try making a raw brownie, and because this recipe seemed easy enough, I printed out the instructions, bought the ingredients and took out my blender.

I couldn’t believe a recipe could be this simple, only required a blender with zero cooking involved, and could still taste so good!
These are made with plenty of nuts, dates, shredded coconut, cocoa powder and vanilla extract. Can you believe how short the ingredient list is? And how chock-ful of nutrients they are?
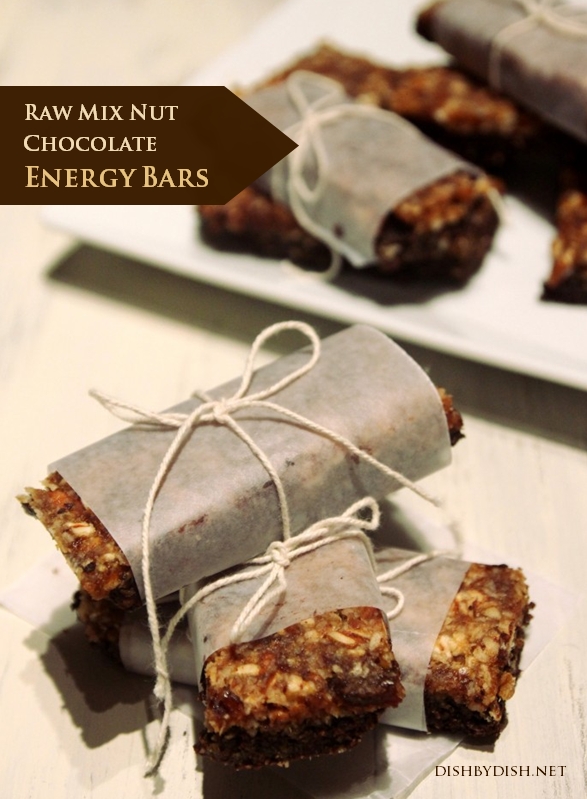
You basically make the topping and brownie base separately, but the only science here is pressing the pulse button on your food processor or blender! (I don’t have a food processor, so I used my fruit juice blender instead!). I cut them into rectangles instead of squares, and called them “energy bars”, but they’re essentially raw brownies with an amazingly flavorful coconut pecan topping.
I devoured them for breakfast over an entire week, and they’re so full of nutrients that it keeps you energetic and full all the way till lunch!
Give these bars a shot and let me know what you think, won’t you?

RAW MIX NUT CHOCOLATE ENERGY BARS (Makes 12 bars)
Lightly adapted from: The Organic Dietitian
Ingredients:
For the Coconut Pecan Topping:
1) ½ cup unsweetened shredded coconut
2) ½ cup pecans, chopped
3) 15 large dates, pitted and roughly chopped
4) 2 teaspoons of pure vanilla extract
5) 1 tablespoon of water (if too dry, add a little more)
For the Brownie Base:
6) 2 cups of walnuts (or any combination of hard nuts)
7) ¾ cup of unsweetened cocoa powder
8) 1 teaspoon of pure vanilla extract
9) ¼ teaspoon of salt
10) 15 large dates, pitted
11) 3 tablespoons of water (if too dry, add a little more)
Steps:
1) Add 15 chopped and pitted dates to the food processor or a blender and blend for a minute until the dates form a thick paste
2) Add in the pure vanilla extract and pulse a few times
3) Add 1 teaspoon of water at a time until the mixture is soft and pureed. If necessary, add a little more water (you want the paste to be thick but also soft enough to mix in other ingredients).
4) In a separate bowl, mix the chopped pecans and shredded unsweetened coconut, then fold in the date mixture from the processor until well-combined. Set aside this coconut pecan topping.
5) In the same food processor, add the walnuts (or combination of hard nuts) and pulse until chopped.
6) Add the cocoa powder, pure vanilla extract and salt, and pulse until combined.
7) With the processor running, add in the dates one at a time until well integrated. (The mixture should stay together when you press it between your fingers.)
8) Add 1 tablespoon of water at a time until you have a thick batter. If necessary, add a little more water. This is the brownie base mixture.
9) Line a square pan with parchment paper and then press the brownie base mixture evenly to cover the entire surface (using the back of a wet spoon helps!)
10) Once the brownie base is in place, press the chocolate coconut topping mixture on top of the brownie mixture
11) Let it chill in the refrigerator for at least one hour before cutting
12) Cut into rectangle bars (or squares) and serve
P.S. If you’re wondering why I’m trying to eliminate wheat from my life, I strongly recommend Wheat Belly – a book that will empower you and make you determined to get rid of wheat and it’s terrible health effects!


Hi,
I love the look and sound of this recipe! Instead of using “15 large dates”, can you specify how many cups/half cups/whatever this comes out to? That would be helpful!
Thank you! I can’t wait to try this recipe out!
Joy
Hi Joy, hmm I’m not exactly sure but I suppose 15 large dates after being pitted would be about 1/2 cup to 3/4 cup? Hope that helps! Thanks for dropping by!